Setting up NordVPN on Your TP-Link Router A Step by Step Guide: Easy Methods, Tips, and Security Tweaks
Setting up NordVPN on your TP-Link router a step by step guide is all about getting a solid, hassle-free VPN connection for every device in your home without juggling apps. Quick fact: a properly configured VPN on your router protects all devices on the network and can dramatically simplify your setup. In this guide, you’ll find a straightforward, user-friendly path to get NordVPN running on TP-Link routers, plus practical tips to optimize speed, privacy, and reliability. Here’s a quick overview of what you’ll get:

- Step-by-step setup for TP-Link routers using NordVPN
- How to verify your connection and test for leaks
- Common issues and how to fix them
- Tips for maximizing speed and stability
- Quick references and resources you’ll want to bookmark
Useful URLs and Resources text only http://www.nordvpn.com https://www.tp-link.com https://support.nordvpn.com https://wiki.vpnbook.com https://www.digitaltrends.com/computing/how-to-use-a-vpn-router https://en.wikipedia.org/wiki/Virtual_private_network
Why use NordVPN on a TP-Link router?
- All-in-one protection: Protect every device on your home network, including smart TVs, game consoles, and IoT devices.
- Convenience: No need to install VPN apps on multiple devices; the router handles it all.
- Consistent privacy: Your IP address is replaced for every device behind the router, not just one app.
Prerequisites and what you’ll need
- A TP-Link router that supports OpenVPN or VPN client mode examples: Archer C7, Archer C9, AX series with VPN client support.
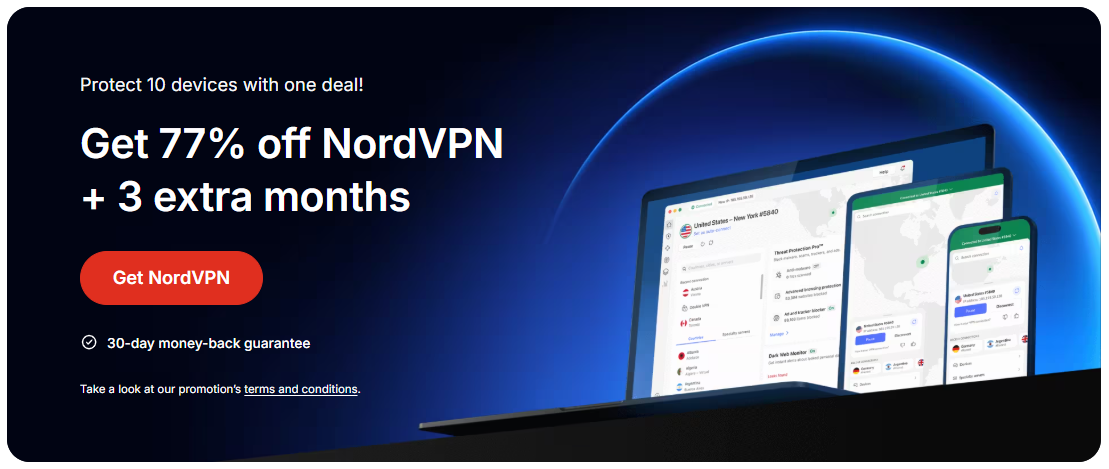
- A NordVPN account. If you don’t have one, consider starting a subscription—they often offer generous limits and fast servers.
- A computer or tablet for configuration wired or wireless.
- An internet connection that won’t drop during setup to avoid mid-configuration headaches.
Tip: Use Ethernet for the setup if possible. It makes things smoother and reduces the chance of losing connectivity mid-way.
Choosing the right NordVPN setup method for TP-Link
NordVPN can be configured on a TP-Link router in two common ways:
- OpenVPN-based setup most compatible, widely supported
- WireGuard-based NordLynx on routers that support it via VPN client
If your TP-Link router supports OpenVPN client mode, that’s the most reliable route for most users. If your router supports WireGuard or NordLynx through a compatible firmware, you can get higher speeds in many scenarios.
Step-by-step: setting up NordVPN on a TP-Link router OpenVPN method
- Get OpenVPN configuration files from NordVPN
- Log in to your NordVPN account.
- Navigate to the VPN configuration section and download the OpenVPN config files for the servers you want to use make sure you pick UDP or TCP depending on your preference.
- Note: Download the files for OpenVPN UDP typically offers better speed.
- Access your TP-Link router admin panel
- Connect your computer to the router via Ethernet or Wi-Fi.
- Open a web browser and go to the router’s admin page commonly http://tplinkwifi.net or http://192.168.0.1 or http://192.168.1.1.
- Log in with your admin credentials.
- Enable VPN client mode on the TP-Link router
- Go to the VPN section this could be under VPN Client, VPN Server, or Advanced Settings depending on your model.
- Choose OpenVPN as the type if prompted.
- Upload OpenVPN files and enter credentials
- Upload the .ovpn file you downloaded for a NordVPN server.
- If the .ovpn file doesn’t include credentials, you’ll need your NordVPN username and password often separate from your main account and possibly a certificate bundle.
- Some TP-Link models require you to copy and paste individual server settings server address, port, etc. from the .ovpn file into the router’s fields.
- Apply and save settings
- Save or apply the changes. The router will attempt to connect to the VPN server.
- If connection fails, double-check server address, port, and authentication details. Also verify that your firmware supports OpenVPN client mode.
- Test the connection
- After the VPN shows as connected, visit a site like whatismyipaddress.com to verify your IP is coming from the NordVPN server location.
- Run a DNS leak test to ensure your DNS requests aren’t leaking outside the VPN tunnel.
- Route devices through the VPN optional
- By default, a TP-Link OpenVPN client setup can apply VPN to all devices. If your router supports split tunneling or policy-based routing, you can choose which devices or apps go through the VPN.
- Save a backup of your VPN configuration
- Once everything is working, save a backup of the VPN configuration in your router’s settings. This helps in case you need to restore later.
Step-by-step: setting up NordVPN on a TP-Link router WireGuard/NordLynx method
Note: WireGuard/NordLynx on TP-Link routers depends on model and firmware. If supported:
- Enable WireGuard or NordLynx in the router’s VPN settings
- Input NordVPN server information or import a configuration if the router provides a WireGuard config file
- Enter your NordVPN credentials and enable the tunnel
- Save and test connectivity and speed
Common troubleshooting tips
- If you can’t connect: try a different NordVPN server location. Some servers are busy or blocked by certain routers.
- DNS leaks: ensure you’re using NordVPN’s DNS or a trusted DNS server within the VPN tunnel.
- Slow speeds: switch servers to nearby locations, enable TCP instead of UDP, or adjust MTU settings if your router allows it.
- Firmware limitations: not all TP-Link models support OpenVPN or WireGuard; if yours doesn’t, consider alternate solutions like using a separate VPN-enabled device or installing custom firmware where supported not all TP-Link devices allow this.
Performance and security considerations
- Server choice matters: proximity usually improves speed, but some servers can be overloaded. Test a few nearby servers to find the sweet spot.
- Encryption level: OpenVPN uses robust encryption with a good balance of speed and security. WireGuard often offers faster speeds with a simpler codebase but may have policy-based limitations on some setups.
- Kill switch: If your TP-Link router supports it, enable a kill switch to prevent traffic leaks if the VPN drops.
- Privacy beyond the VPN: consider disabling external DNS leaks and using DNS over TLS if your router supports it for an extra layer of privacy.
Security best practices when using NordVPN on TP-Link routers
- Use strong admin passwords on your router.
- Regularly update firmware to patch vulnerabilities.
- Turn on router firewall features and disable WPS if possible.
- Monitor connected devices and review logs periodically for unusual activity.
Performance optimization tips
- Choose nearby server locations for better speeds.
- If you’re gaming or streaming, test both UDP and TCP variants to see which performs better on your network.
- Consider enabling hardware acceleration if your router supports it.
- Reboot your router after updated VPN settings to ensure the tunnel is properly established.
Advanced configurations optional
- Split tunneling: Some TP-Link models support routing rules to decide which devices or traffic use the VPN vs. direct internet access.
- Custom DNS: Configure NordVPN DNS or another trusted DNS to reduce DNS leaks.
- Automatic reconnect: Enable automatic reconnect on VPN disconnections to maintain a constant secure connection.
Maintenance and updates
- Check for firmware updates on your TP-Link router regularly.
- Re-check NordVPN server availability if you notice changes in performance.
- Periodically test for DNS leaks and IP leaks to confirm ongoing privacy.
Quick reference checklist
- Confirm router model supports OpenVPN or NordLynx
- Download correct NordVPN OpenVPN configuration files
- Access router admin panel and enable VPN client
- Upload/import server settings and credentials
- Save settings and test VPN connection
- Verify IP and DNS leak protection
- Enable kill switch and automatic reconnect if available
- Consider split tunneling if needed
- Keep firmware and VPN app credentials up to date
Real-world tips from users
- Many users report smoother performance using UDP OpenVPN, but if you encounter instability, switch to TCP or a nearby server.
- For households with many devices, a VPN-on-router setup saves time and avoids repetitive app installs.
- A common pitfall is forgetting to save the VPN configuration after making changes; always confirm your settings are applied.
Tables: comparison of methods
| Method | Compatibility | Speed | Complexity | Best For |
|---|---|---|---|---|
| OpenVPN on TP-Link | High most models | Moderate to Fast | Moderate | Most users, reliable connection |
| WireGuard/NordLynx on TP-Link | Model dependent | Fast | Moderate to Easy | Speed-focused users on supported models |
| No VPN on router device-based | N/A | N/A | N/A | Quick setup, single device |
Quick server location ideas
- United States New York, Los Angeles
- United Kingdom London
- Germany Frankfurt
- Singapore
- Australia Sydney
Security considerations for family networks
- Ensure smart devices like cameras, lights, and thermostats don’t leak sensitive data through unsecured channels.
- Use a guest network feature to segment devices that don’t need VPN protection.
- Regularly audit connected devices and update passwords.
Maintenance schedule
- Monthly: test VPN connection and monitor for DNS leaks.
- Quarterly: review router firmware and NordVPN subscription settings.
- Annually: reassess server locations and security configurations.
Final setup tips
- If you run into persistent issues, consider a factory reset and redoing the setup from scratch with a fresh config file.
- Keep a spare OpenVPN config file for a backup server in case your primary one fails.
- For homes with many devices, plan your network topology to ensure QoS Quality of Service isn’t impacted by VPN traffic.
Frequently Asked Questions
How do I know if NordVPN is working on my TP-Link router?
You can verify by checking your IP address on whatismyipaddress.com and ensuring it reflects the NordVPN server location. Run a DNS leak test as well to confirm DNS requests are routed through NordVPN. Is Quick VPN Safe for Your Online Privacy and Security: A Practical Guide to Quick VPN Safety and More
Can I use NordVPN on a TP-Link router with only USB tethering?
Usually not; most TP-Link routers require built-in VPN client support. If your router only offers basic features, you may need a different model or run a connected device as a VPN gateway.
Do I need a NordVPN account to configure the router?
Yes, you’ll need your NordVPN login details and configuration files to complete the setup.
Will VPN slow down all my devices?
It can affect speed due to encryption and server distance. Choosing a nearby server and using UDP often reduces slowdowns.
Is there a kill switch on TP-Link routers with NordVPN?
Some models offer a kill switch in the VPN settings. If available, enable it to prevent data leakage if the VPN drops.
Can I split-tunnel with NordVPN on a TP-Link router?
Split tunneling is model-dependent. If your router supports it, you can route specific devices through VPN while others access the internet directly. Le guide ultime pour le streaming sans limites avec nordvpn
How often should I update NordVPN or router firmware?
Regularly. Check for firmware updates monthly and NordVPN client updates whenever available to maintain security and compatibility.
What is the best server location for streaming?
Nearby servers and those optimized for streaming NordVPN sometimes lists streaming-optimized servers can help avoid throttling and buffering.
What if my router doesn’t support OpenVPN or WireGuard?
Consider upgrading to a model that supports VPN client mode. Alternatively, run NordVPN on a dedicated device like a PC or NAS and use it as a gateway for the rest of your network.
How do I back up my VPN settings?
Most TP-Link routers let you export your VPN client configuration. Save it to a secure location so you can restore quickly after a reset or firmware upgrade.
Sources:
Nordvpn 使用教學:2026年完整指南 註冊、設定、使用秘 從入門到進階的完整解密與實測 Is vpn safe for hxp: Is VPN Safe for HXP, VPN Safety, and How to Stay Protected
Windows 10でvpn設定を変更・追加・削除する方法【初心者】
Whats my public ip address with nordvpn on windows a smarter way to check
缅甸vpn 全面评测与实操指南:在缅甸使用、选择、以及隐私保护的完整攻略
Surfshark vpn port forwarding the ultimate guide to getting it right
'%2F%3E%3Ctext%20x%3D'50%25'%20y%3D'50%25'%20dy%3D'.35em'%20text-anchor%3D'middle'%20font-family%3D'-apple-system%2CBlinkMacSystemFont%2CSegoe%20UI%2Csystem-ui%2Csans-serif'%20font-size%3D'100'%20font-weight%3D'600'%20fill%3D'%23fff'%3ESR%3C%2Ftext%3E%3C%2Fsvg%3E)
Soraya Rhinehart has been writing about consumer technology since 2018, with bylines covering streaming geo-unblocking, privacy law, and router firmware. Approaches each review by setting up the product the same way a typical reader would and recording every snag along the way.